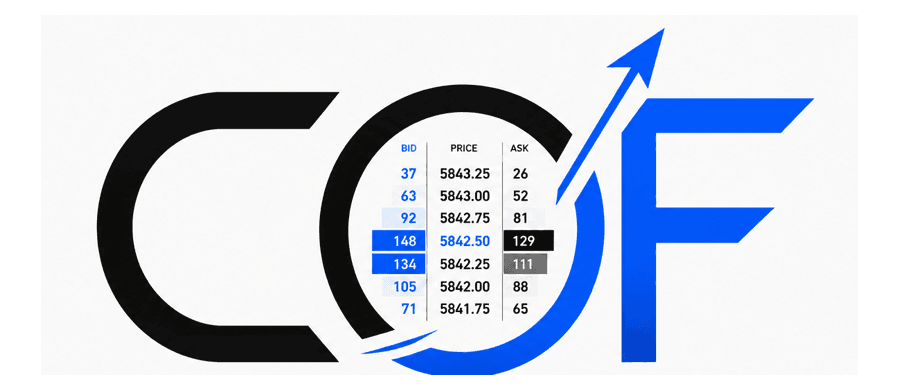
How to Read an Order Flow Footprint ATAS — Complete Tutorial
The ATAS footprint chart reveals bid/ask, delta, and absorption at every price. Complete guide to reading an order flow footprint: cells, imbalances, delta divergence.
Erwin
Founder cofiatrading
There is one piece of information that institutional traders see on their screens and that the majority of retail traders ignore.
It's not secret data. It's not a proprietary indicator. It's simply the volume split between buyers and sellers, at every price level, tick by tick.
That's what a footprint chart is.
And once you know how to read it, you'll never look at the market the same way. Ever again.
In this tutorial, I'll explain exactly how to read an order flow footprint on ATAS: bid/ask cells, delta, how to detect absorption, imbalances, and how to use delta divergence to anticipate a reversal. This is the foundation upon which all the proprietary strategies I trade live are built.
Free Volume Profile Cheatsheet PDF →
What the candlestick chart doesn't tell you
A classic candlestick chart shows you four things per time unit: open, high, low, close.
What it doesn't show you: who traded and in which direction.
A 20-point green candle on the NQ could mean aggressive buyers pushed the price up. It could also mean massive sellers were absorbed by an institutional buyer building a position. The outward appearance is identical. The interpretation is radically different.
The footprint chart fixes this flaw. It displays, for every price level visited within the candle, two numbers:
- The bid volume (seller), market orders that hit the bid. These are sellers who don't want to wait and send a sell market order. Counter-intuitive, but that's how it is: "bid volume" = volume traded on the bid = aggressive seller.
- The ask volume (buyer), market orders that hit the ask. Aggressive buyers sending a buy market order.
The difference between the two is called the delta. It's the net number of contracts traded on the buy side.
Anatomy of a footprint cell
Before detecting anything, you must master how to read a cell.
In ATAS in "Bid x Ask" mode, each cell looks like this: [bid] × [ask]. On the left, the seller volume at that tick. On the right, the buyer volume.
Anatomy of a Footprint Cell — NQ Jun 2026
Educational diagram — illustrative data. Source: ATAS footprint layout.
In the example above, let's look at the 18 510 level: 2 318 × 2 401. Both sides are close, the delta is +83. This is a balanced level, neither buyer nor seller dominance. The footprint POC (point of maximum volume).
At the 18 512 level: 342 × 891. Delta +549. Strong buyer imbalance. Buyers hit aggressively at this level. In a bullish context, this is continuation.
At the 18 511 level: 1 204 × 487. Delta -717. Strong seller imbalance. But if the price doesn't drop after this level, we are potentially looking at absorption.
Basic rule: bid >> ask = dominant sellers at this level. Ask >> bid = dominant buyers. Accumulated positive delta = net buying day.
Delta, the most important footprint metric
Delta gives you the net pressure at any given moment.
Cell delta: ask − bid at a given price level.
Candle delta: sum of the deltas of all cells in the candle.
Cumulative delta: sum of all deltas since the start of the session (or from a reference point).
The reason delta is powerful: it measures directional aggression. If the cumulative delta is strongly positive, it means buyers have been paying the ask all day. If the delta is strongly negative, it's the sellers.
It gets interesting when delta and price diverge. And that's where you see professionals positioning themselves.
If you haven't read our complete volume profile guide yet, take a detour; the POC, VAH, VAL concepts are useful prerequisites for advanced footprint reading.
Detecting Absorption in an ATAS Footprint, the Most Underestimated Signal
Absorption is the most powerful order flow phenomenon to identify. And also the most counter-intuitive.
Definition: absorption occurs when a large volume hits one side of the market, but the price does not move in that direction.
Concrete example: you see 3 200 bid contracts in one minute at the 18 491 level. Massive aggressive sellers. Logically, the price should drop. But it stays at 18 491. And the next minute, it rises to 18 495.
What happened: an institutional buyer (or a group of buyers) absorbed every single one of those 3 200 sells. They were there, waiting, buying everything the sellers were offering them. Once the sellers are exhausted, the price has no more downside pressure, it rises.
Absorption — massive sellers, price doesn't give way
Selling volume increases drastically at the 09:33–09:35 levels. Price does NOT drop. This is an institutional buyer absorbing every sell order. Bullish signal.
Educational diagram — illustrative data. Absorption = massive sellers, price stable or rising.
The diagram above shows exactly this scenario: between 09:34 and 09:35, the seller volume explodes (3 200 contracts). But look at the purple price line, it doesn't move. At 09:36, the sellers are exhausted. The price takes off to the upside.
How to identify absorption on ATAS:
- Abnormally high bid volume on a support level (or ask side resistance)
- Price stagnating or rising slightly despite seller volume
- Negative candle delta (dominant sellers) but a high candle close, this is the classic signal
This is one of the filters our agents apply automatically to every signal. A setup without absorption at the entry level is treated with less confidence.
Imbalances in an Order Flow Footprint, Identifying Institutional Shoves
An imbalance is when one side of the market hits at least 4 times harder than the other at a given price level.
In ATAS, by default, the imbalance threshold is set to 300% (ask ≥ 3× bid, or bid ≥ 3× ask). We prefer working with 400% (×4) to filter out the noise.
Footprint Imbalances — aggressive buyer / seller imbalance
When ask ≥ 4× bid across several consecutive levels (green), buyers have hit hard. When bid ≥ 4× ask (red), these are aggressive sellers. These clusters often precede an extension.
Buyer Stack (18 520–18 522)
3 consecutive levels with ask ≥ 4.6×. Aggressive buyers. Probability of bullish continuation.
Seller Stack (18 517–18 518)
2 consecutive levels with bid ≥ 5×. Aggressive sellers. Potential resistance zone.
Educational diagram — illustrative data. Standard imbalance threshold: ask/bid ≥ 4× (configurable in ATAS).
What's interesting in the diagram above: the ask imbalances (buyers) are concentrated at the 18 520–18 522 levels. The bid imbalances (sellers) at 18 517–18 518. These two clusters face each other, it's a combat zone between institutions.
What a cluster of ask imbalances (several consecutive levels) tells you:
- Buyers are in a hurry to get in. They aren't placing limit orders, they are hitting the market aggressively.
- If the cluster is at the bottom of a structure (support zone), it's accumulation.
- If the cluster is at the top of a range, it's a breakout attempt, watch if the price holds above.
Practical rule: 3 consecutive levels with an imbalance in the same direction = strong signal. Used in confluence with a POC test, it's one of the cleanest setups in order flow.
To use these tools on ATAS, you can start with the free demo account:
Footprint & volume profile
Delta Divergence in the Footprint, the Warning Signal Before the Reversal
This is the advanced setup. The one that separates beginner footprint readers from confirmed ones.
Delta divergence occurs when the price rises (or falls) but the cumulative delta goes in the opposite direction.
Delta / Price Divergence — reversal signal
From 09:40 to 10:00, price continues to rise (purple line). But cumulative delta (orange line) plunges. Sellers are hitting hard at every new high. At 10:05, price breaks down.
Educational diagram — illustrative data. Divergence = warning signal, never an isolated trade signal.
Before going further, here is how I visualize an entire session in a footprint heatmap. This aggregated view reveals where the market actually traded its volume, candle after candle:
Heatmap volume footprint — 8 bougies × 7 niveaux prix
Plus la cellule est foncée, plus le volume échangé est élevé. Le cluster central révèle le POC dynamique.
Schéma — un cluster lumineux centré = zone de valeur intraday. Périphérie sombre = LVN.
The darker the cell, the higher the volume. The dense cluster in the center is the session's dynamic POC — this is exactly the zone around which institutions build their positions.
The second visual pattern to recognize at first glance is the stacked imbalance: 3 or more consecutive price levels with an imbalance ≥ ×4 in the same direction. A single imbalance = noise. 3+ stacked = institutional shove:
Stacked imbalance — 4 niveaux ask consécutifs ≥ ×4
Quand 3 niveaux ou plus s'empilent dans le même sens, c'est un coup de boutoir institutionnel.
Lecture : 4 niveaux empilés (18 522 → 18 528) = breakout buy attempt confirmé.
Si le prix tient au-dessus de 18 522 après le stack, entrée long avec stop sous 18 518.
Schéma — un single imbalance = bruit. 3+ stacked = signal pro.
When you see 4 consecutive ask levels as in the diagram above, it's no longer probabilistic: it's a directional force that forced the market. My entry trigger is located exactly on the retest of the first level of the stack.
In the diagram above:
- From 09:30 to 09:40: price rises, delta rises. Normal. The rally is supported by aggressive buyers.
- From 09:40 to 10:00: price continues to rise (new highs). But the delta plunges. These are sellers hitting aggressively at every new high.
- At 10:05: the price cracks. The sellers were right.
Why it works: if the price rises but aggressive sellers accumulate at the top, it means someone is distributing (selling their position to retail buyers). It's a distribution signal, the market has no more fuel to continue the rally.
It's a warning signal, not an isolated entry signal. We cross-reference it with the volume profile structure (VAH, POC), the session context, and our proprietary filters. But on its own, a strong delta divergence at a range high has a measurable predictive value.
How to Configure ATAS to Read the Footprint
A few essential settings to get started:
Display mode:
- In the ATAS chart panel, select "Bid x Ask" as the footprint type. This is the basic view for reading cells.
- Alternatively, "Delta" directly displays ask − bid per level, quicker to read for traders just looking for directional sentiment.
Imbalance threshold:
- Settings → Footprint → Imbalance → 400% (recommended threshold to filter noise)
- Enable coloring for imbalanced cells (green for dominant ask, red for dominant bid)
Cumulative delta:
- Add the "Cumulative Delta" indicator to your chart. It draws a line tracking the delta since the start of the session.
- Set a daily reset to start from zero every morning at the CME open.
Cluster filter:
- Filter cells with volume < 50 contracts to only see significant levels. On the micro NQ, adjust to 10-20 contracts.
If you want to go further with the configuration and see how we structure our live readings, the cofiatrading training covers this in detail, especially how to combine the footprint with the session volume profile.
How We Use the Footprint at cofiatrading
Manual footprint reading is useful. But what we've built goes further.
Our AI agents scan the tick-by-tick feed continuously and apply automated detection rules for absorption, imbalances, and delta divergence. Not to replace human judgment, but to filter out the noise and only flag setups that pass multiple filters simultaneously.
When a signal hits the VIP channel, it has already been validated by:
- Price position relative to the volume profile (POC, VAH, VAL)
- The presence of absorption or imbalances at the entry level
- The absence of an opposing delta divergence
- A compatible session context (range, trend, transition)
It's not magic. We have losses. We talk about it in the public results. But footprint reading is the foundation that gives consistency to every entry, we know why we're entering, not just where.
Key Takeaways
- The footprint shows bid × ask at every price level, both sides of the transaction, not just the outcome.
- Delta (ask − bid) measures directional aggression. Positive delta = dominant buyers over the period.
- Absorption: large volume on one side, price not moving. Potential reversal signal.
- Imbalances (≥ 4×): institutional shoves. 3 consecutive levels = strong signal.
- Delta divergence: price and delta going in opposite directions = distribution/accumulation warning signal.
- All of this can be read on ATAS, the reference platform for CME futures footprint.
Going Further
- Complete Volume Profile Guide, the basic grammar (POC, VAH, VAL, HVN, LVN).
- VAH VAL, the Secret of Institutions, the value area and its migrations.
- POC, 4 High-Probability Setups, 4 classic configurations around the Point of Control.
- Position Size Calculator, size properly before every entry.
Go Further with Training
- Module 03 · Advanced Footprint — 6 patterns that work, detailed absorption and imbalances, step-by-step ATAS settings, quantified NQ A+ setup.
- Module 07 · CVD & Delta — cumulative delta, divergences, delta-per-price, measured setups.
- See the 8 Proprietary Strategies or Join the VIP Club to receive footprint-filtered signals.
Disclaimer, cofiatrading publishes educational and analytical content. Nothing written here constitutes investment advice as defined by the Spain/EU CNMV/ESMA canon. Trading leveraged instruments carries a risk of capital loss. Retail loss rate on CFDs in Europe: 74-89% depending on the broker. Past performance does not predict future results.